Service Authorization
Introduction
Every service that you integrate with, be it an outgoing Consequence or an incoming Condition, will require some sort of authorization. While there are several methods for this, authorization usually falls into one of several broad patterns that Zeleo has handled.
WebHook
This is the easiest method if a service supports it; basically the idea is if you are have the rights in the external system to paste in a URL and tell it to hit an endpoint when certain events occur, then that WebHook is authenticated by the setup step. GitHub works this way- any repository admin can paste in a URL as a WebHook and define when that URL will be hit. The client is assumed to be trusted since and admin provided that configuration. Pingdom also does this; Zeleo Applications that define Conditions can be developed very rapidly using this method.
OAuth2/OpenID Connect
Increasingly ubiquitous is the OAuth2/OpenID Connect authorization flow. The first step is generally defined, though the response depends on the system and thus must be handled by your service. To start, you will need to add a configuration of type ‘Authorization’ in your Zeleo Application definition. What this will do is create a button for either the Team Administrator or User (or both) that when clicked will ask the external service for permission. The user will then need to login to that service and agree to allow Zeleo rights according to the scope defined.
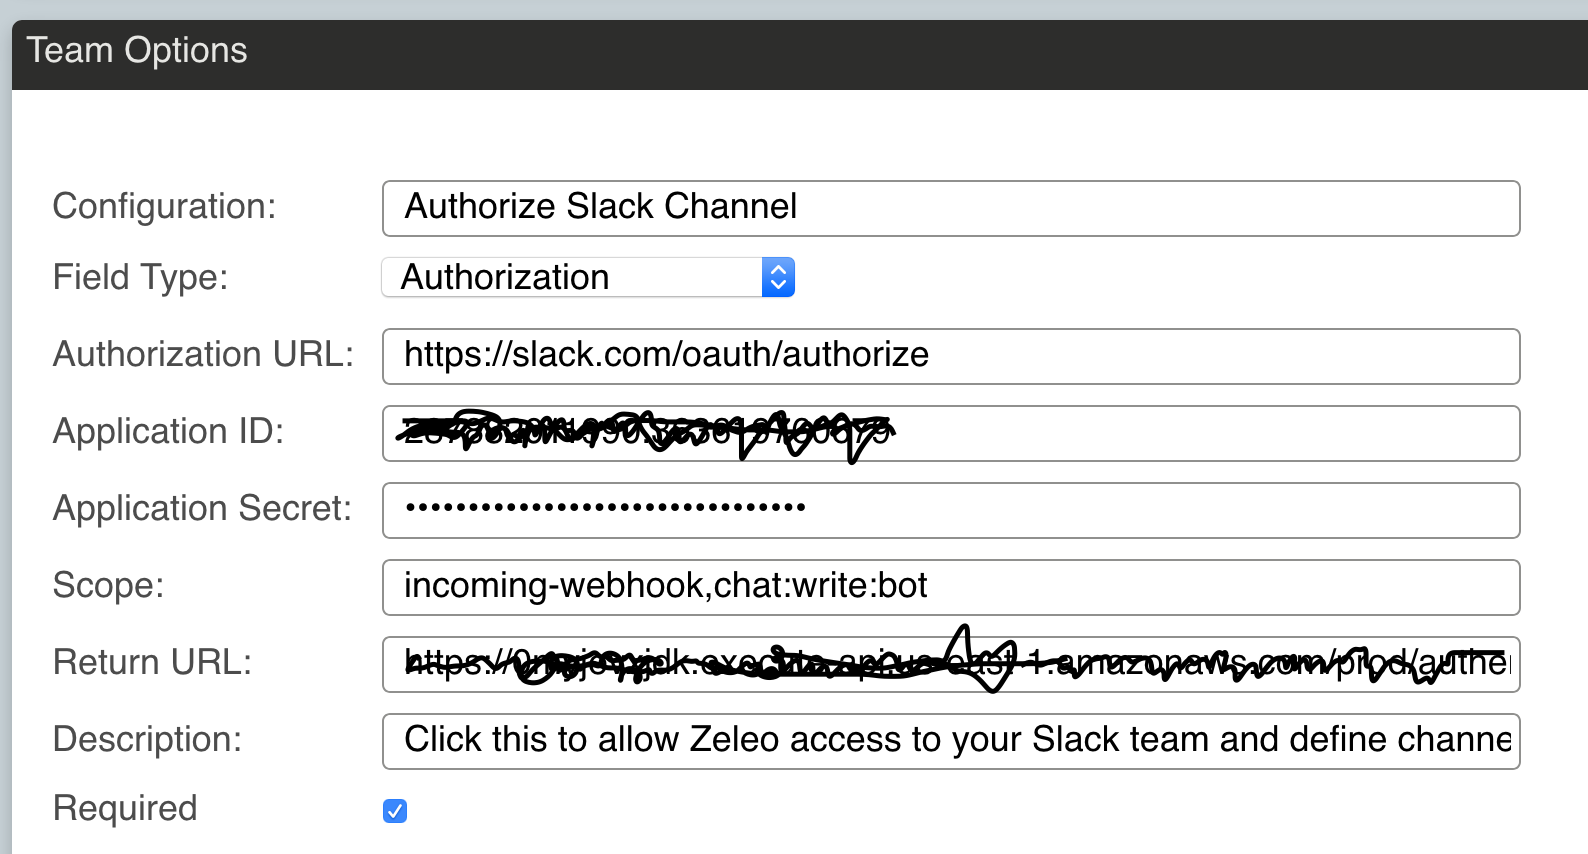
The following defines the OAuth2 authorization button for the Slack Zeleo Application:

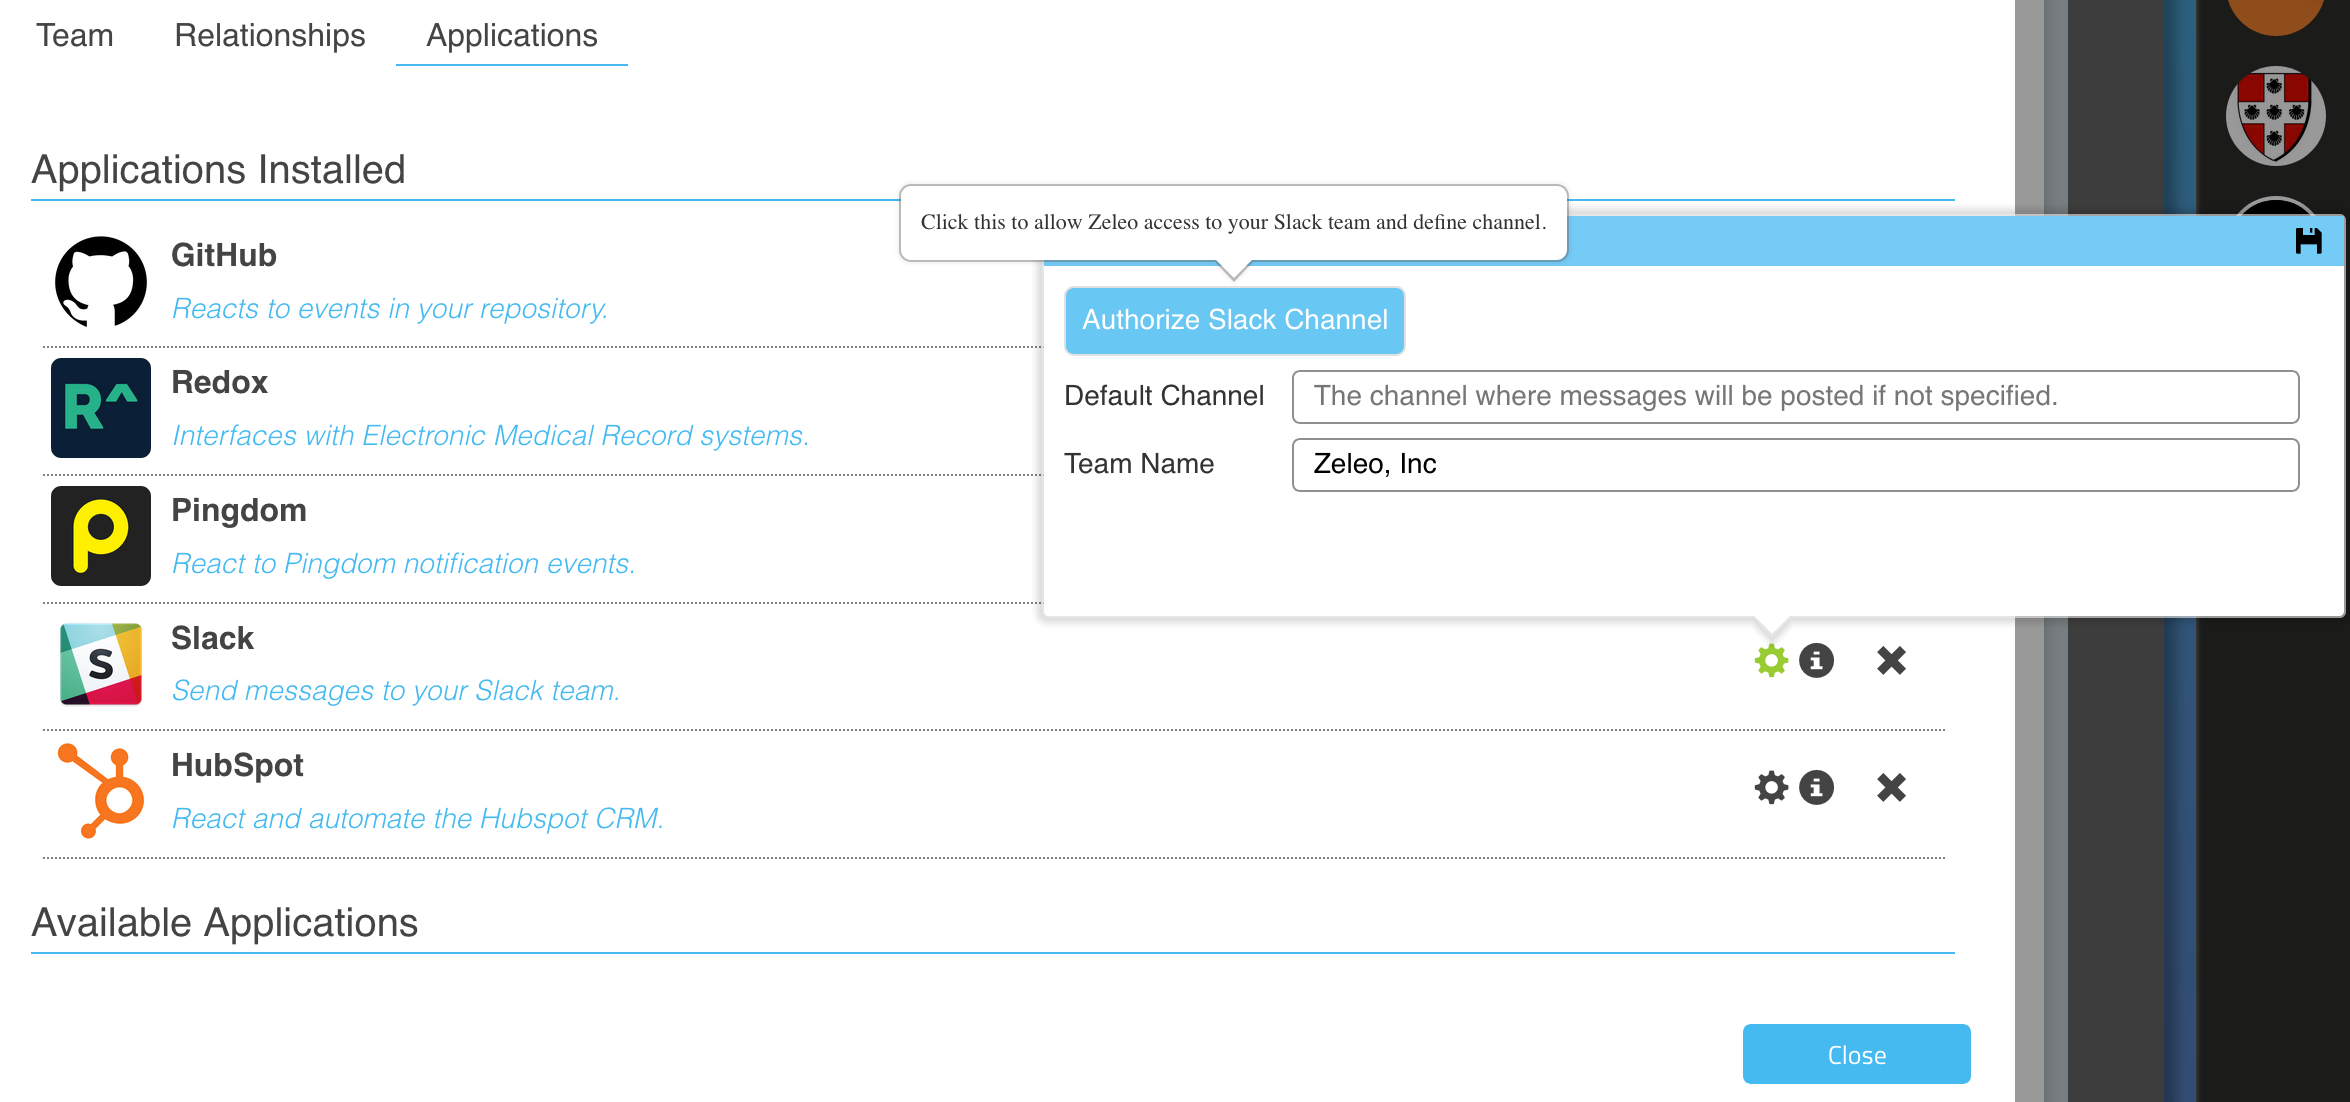
And here is how it will look to te Zeleo user:

Notice you will need to sign up with the service to get an id and secret for the Zeleo Application. The scope is a list or permissions you will need to request from the user. The Return URL will need to be handled by your service since the data returned after the user provides permission is not standardized, and you will usually need to persist whatever is returned. Usually what is given is an authentication token and a refresh token used to request a new authentication token if expired. Sometimes other data is returned, like in the case of Slack where the URL corresponding to the channel that was permitted is returned. You will need to store these in your service as any request to the service will need to add the token in a header for the request that looks like this:
Authorization: Bearer <token>
When the Zeleo Admin or Zeleo User goes to configure the Zeleo Application, they will be presented wth a button that opens a new tab to ask permission. When that user logs into that system and allows Zeleo the access to that system, your service will be sent the data it needs to connect.
While it seems confusing at first, the steps for doing this are pretty simple once you get the hang of it. Usually the procedure is as follows:
- Log into the system you want to receive data from or post data to and create a development account.
- Create an Application in that system for Zeleo to get the Application ID and Application Secret.
- Create an endpoint in your service to handle the response.
- Create an Authorization configuration in Zeleo for your service and add the Application ID, Application Secret, scope as defined by the documentation for the service, and add in the URL to the your service to handle the response.
- Store the data and add the code to use the approproate token when making a request or subscribing for updates.
- Handle the situation where a token is expired by retrieving a new token.
If we can simplify this further with the Zeleo platform we will do so, so stay tuned.
Token
This is increasingly rare, but some systems simply require the user in the external system to generate a token. In that case you usually can create an account, generate the token, and add it as an environment variable to your service. That way you can add it to the header of any request to use the API of the system in question.